No products
Adjustable Step Down DC - DC converter
0104110000026200
New product
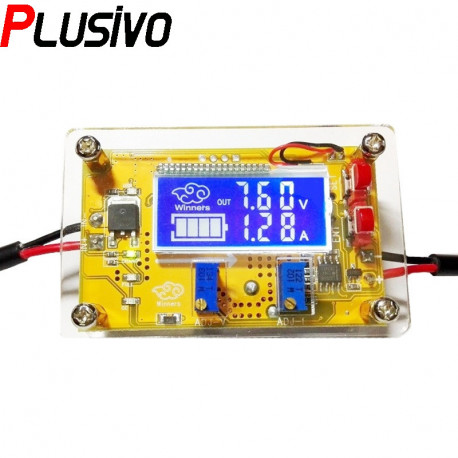
This DC-DC converter has wide input voltage from 6 V to 32 V. It features a USB interface, and shell casing with fan openings and a radiator for heat dissipation. This converter is commonly used as step-down module, battery charger, a constant current driver module and more.
See Description for more details about the product.
Add to cart now!
1 Item
Warning: Last items in stock!
More info
Overview
This DC-DC converter has wide input voltage from 6 V to 32 V. It features a USB interface, and shell casing with fan openings and a radiator for heat dissipation.
This converter is commonly used as step-down module, battery charger, a constant current driver module and more.
Specifications
- Input voltage: 6 V to 32 V
- Output voltage: 1.5 V to 32 V
- Maximum output current supported: 5 A
- Maximum recommended output current: 4.5 A
- Maximum output current without fan: 3 A
- Maximum output power: 75 W
- Maximum output power recommended: 50 W
- Operating temperature: -20 ~ +70 degrees Celsius
- Operating Frequency: 180 kHz
- Efficiency: up to 96%
- Short-circuit protection: YES, constant current limiting
- Over-temperature protection
- Reverse power protection
- Dimensions: 65.6 x 40 x 25 mm
- Weight: 77 grams
Setting Instructions
The setting key can set the display mode, which is divided into four types:
1. F-0 mode: display output voltage
2. F-1 mode: display the input voltage
3. F-2 mode: alternately display input and output voltage
4. USB mode: display the USB output voltage and turn on or off the USB output
Instructions for use: Press the "Settings" button to cycle through 4 display modes, the corresponding indicator lights will be on or off, press the "OK" button to save and exit, press the "OK" button alone to switch the LCD screen backlight.
The voltage source can have several destinations, such as its simple use as a lowering voltage source, use as a battery charger (Caution: an output diode must be added to avoid the return of current to the battery), use as LED driver or as a power supply for USB devices.
Careful! If you notice that the measurements on the screen are not correct, the voltage source must be calibrated.
Calibration Method
Voltage: Starting with the power supply off, press and hold the SET button, the source will turn on and the screen will flash; at this point, you must stop pressing the button. To change the displayed voltage, you must press the SET button to increase and the OK button to decrease. After the calibration has finished, you have to wait two seconds and the value will be automatically saved. At this point you can turn off the power supply.
Current: Starting with the power supply off, hold down the OK button, the power will turn on and the screen will flash; at this point, you must stop pressing the button. To change the displayed intensity, you must press the SET button to increase and the OK button to decrease. After the calibration has finished, you have to wait two seconds and the value will be automatically saved. At this point you can turn off the power supply.
Caution: To ensure that the devices are properly powered on the USB socket, please check the port voltage before connecting.
Scope of Application
Note: The constant current adjustable current must be in constant current mode only when the actual load output current is greater than the set current, otherwise it will work in a constant voltage state, not the current is adjusted to 2A, that is, it will become 2A if any device is connected. Know. The constant current of output voltage above 2V will take effect!
1. Use as an ordinary step-down module with overcurrent protection capability
Instructions:
( a ) Adjust the "constant voltage potentiometer ADJ-V" to make the output voltage reach the voltage value you want;
( b ) an output terminal shorted directly module (find forceps of thick wires or shorted to the output terminal, NOTE: Do not short-circuited when the regulated voltage ) , this time adjust "potentiometer constant the ADJ-the I " make The displayed current value reaches the preset overcurrent protection value ; or the current can be adjusted when the load is connected.
(For example, the current value displayed by the on-board ammeter is 4A , then the maximum current of the module is limited to 4A , when the current reaches 4A , the constant current indicator light will be red)
( c ) Connect the load and work.
2. Use as a battery charger
Instructions:
( a ) Determine the floating voltage and charging current of the battery ; (If the lithium battery parameter is 3.7V/2200mAh, then the floating voltage is 4.2V , and the maximum charging current is 1C , which is 2200mA )
( b ) Under no-load conditions, adjust the "constant voltage potentiometer ADJ-V " to make the output voltage reach the float voltage ;
( c ) Short- circuit the output terminal of the module directly ( find a thick wire or tweezers to short- circuit the output terminal, note: do not adjust the voltage when short-circuiting ) , at this time adjust the "constant current potentiometer ADJ-I " to The display current value reaches the preset charging current value ; or the current can be adjusted when the load is connected.
( d ) The default charging current of the lamp is 0.1 times the charging current ; (The current of the battery is gradually reduced during the charging process, and the constant current charging is gradually changed to constant voltage charging. If the charging current is set to 1A , then when When the charging current is less than 0.1A , the yellow light of the charging indicator is off, and the blue light of the full indicator is on, and the battery is fully charged at this time )
( e ) Connect the battery and charge.
3. Use as a constant current LED driver module
( a ) Determine the operating current and maximum operating voltage you need to drive the LED ;
( b ) Under no-load conditions, adjust the "constant voltage potentiometer ADJ-V " to make the output voltage reach the LED operating voltage ;
( c ) Directly short- circuit the output terminal of the module ( find a thick wire or tweezers to short- circuit the output terminal, note: do not adjust the voltage when short-circuiting ), at this time adjust the "constant current potentiometer ADJ-I " to The displayed current value reaches the preset LED working current ; or the current can be adjusted when the load is connected.
( d ) Connect the LED and test the machine.
Note: The copper pillars used in the housing are gradually replaced with higher-cost nylon pillars. The nylon pillars are insulated, anti-corrosive, and lighter. Don't say this is plastic, this is nylon! nylon! nylon! Say the important thing three times!
Precautions
1. Do not share the input ground and output ground of the module together. This will cause the module current sampling resistor to bypass, so that the module cannot adjust the output current, and it is easy to burn the module when the load is connected.
2. There is a series of current sampling resistors at the output of the module, and there will be a voltage drop of 0~0.2V after the load is connected, which is a normal phenomenon.
3. Some customers report that the output voltage of the module cannot be adjusted because the default output voltage of the module is about 20V when it leaves the factory. When you encounter this kind of problem, please turn the left ADJ-V potentiometer counterclockwise for more than 10 turns until the voltage value changes, and then use the module to adjust the voltage
4. When the output exceeds 3A or 35W, please strengthen heat dissipation! It is recommended to install a small fan at the input end!
Package Includes
- Adjustable Downlight with LCD;
- Radiator;
- Casing.
The cooler in the image is not included.
Don't delay, buy today.
Add to cart now!
Reviews
Worked great!
Using to convert 12V rechargeable battery to 5.8V to power a portable keyboard. It works!
Excellent item fast shipping
The listing accurately describes the product.
Great value and works excellent
This was just what I was looking for. Easy to use voltage is accurate. Even though it was inexpensive it works great. I used it to regulate my 24volt printer fan power to 12v since there are not many choices of 24v fans.
Awesome product
Very cool voltage regulator. Also has us charge socket.
Works perfect
Let's you custom set the output voltage and amps, very nice!
Customers who bought this product also bought:
-
Black...
Black digital thermometer with an external...
₱69.00
-
PAM8610 2x15...
The PAM8610 integrated circuit is a 10 W...
₱64.00
-
Plusivo...
single row pin headers bent pin headers...
₱249.00
-
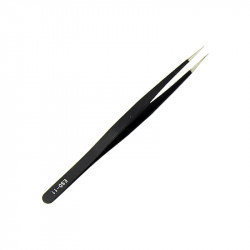
ESD-11...
This straight tweezers is made of high quality...
₱39.00
-
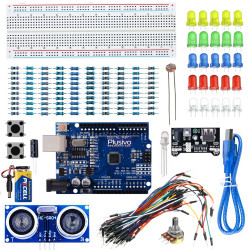
UNO R3...
UNO R3 Electronics Starter Pack
₱429.00
-

7x19 cm Glue...
7 x 19 cm high viscosity transparent hot melt...
₱5.00
-

RJ45 Crimp Tool
This Crimp Tool is ideal for cutting wire,...
₱93.00
-
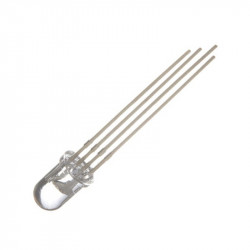
RGB LED...
Are you in need of a bunch of bright and...
₱6.00
-
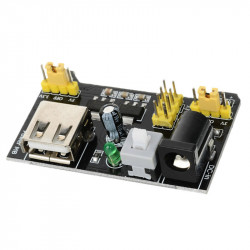
Breadboard...
The breadboard power supply takes power from...
₱39.00
-

400 pcs...
Heat shrink tubing has been designed to offer...
₱99.00

